Wednesday, August 22, 2018

Slope Graffiti

No holds barred!!  Fill the paper!! Tag it up!  It's Slope Graffiti!


I want you to tell me everything you can about the equation assigned.  Everything!  The more the better.  There is really no right or wrong here.  It is just about recalling and applying their knowledge. I first did this in a grant I attended several summers ago and have made it a regular assignment in my Algebra 1 and Math Models Classes. 


In Math Models (a post Algebra 1 class), I do this on the third day of school!  It takes a bit of effort and many students to have a difficult time writing down anything about math.  Many can say it and remember it but actually putting it down takes practice that I focus on throughout the year.  In Algebra 1, I assign this after all necessary teaching and practice have been done on slope-intercept form.

I have 2 versions.  The first have the equations in slope-intercept form.  The next time we do it, 2nd semester in Algebra, it is in standard form.  I provide a graph template for them as well so they do not have to draw a graph free hand.  I allow one full class period.

I have a PPT with 4 different slides of equations.  On each one, I did put the parent function.  I display this throughout the class period.  they do work in groups so I have very relevant math vocabulary as their Group Names.  


I have had some beautiful and excellent projects over the years but unfortunately lost them to the floods so I cannot show you.  One of the few things I did not photograph!!  Ugh!!!  Generally, later on in the year, there is a lot more 'writing' on the posters but my students did an excellent job this year for the third day of school.  

There were a lot of laughs, some struggles, but in the end they all remembered the critical basic information!  Below are some selected pictures from this year.
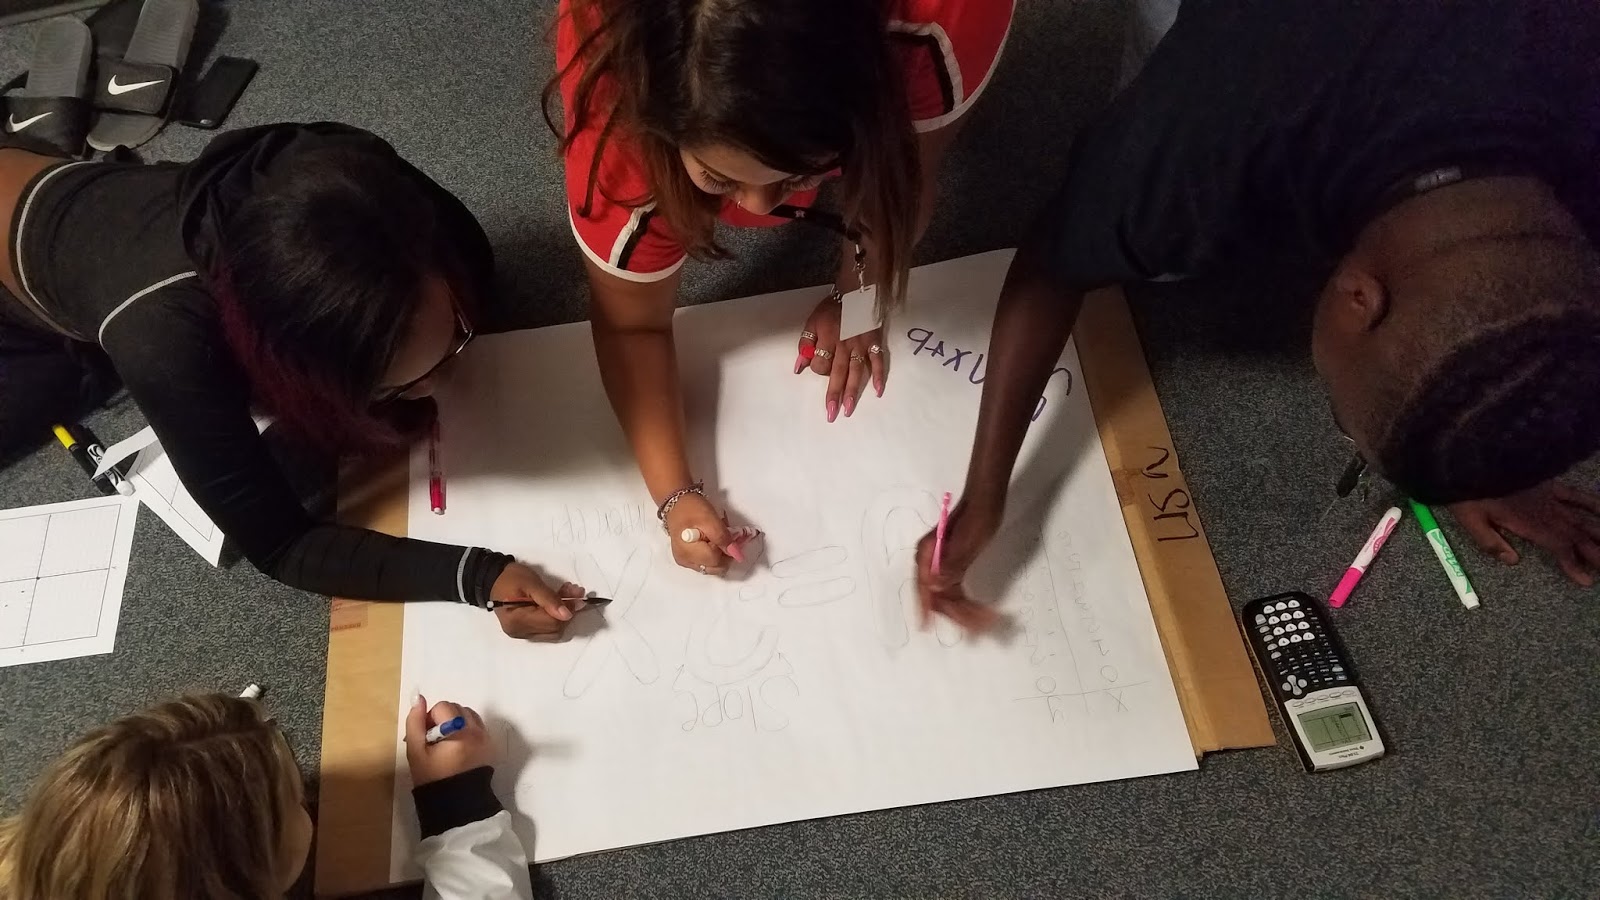


I have been working for 3 years now to have students write more about math so you can definitely see a progression throughout the year when I ask them to do these type activities.  I also have a notebook/journal warm-up that goes along with this concept:


They are just instructed to tell me anything they can about it!  I also have a bunch of one page different equations they could do.  I will include all of them in the link below.  The font used is KG Girls on Fire and can be downloaded here for FREE!  I just love fonts!!!


Thank You and Enjoy! 
Lisa

Sunday, July 15, 2018

Headbands Are All the 'Math' Rage!

Where do I start with this little piece of genius I was taught a few summers back?!?!  There are no words for the educational value of these 6 strips of paper.  


Way back in the summer of 2016, my life was forever changed when I joined a grant through Texas Regional Collaboratives.  UTMB in Galveston had a Grant taught by Valerie Blackburn and Jennifer Clayton.  

So of course, I needed to create one for my class.  This little gem was shared and it has snowballed on our campus!  Yes, almost all levels of core math use it now. 


The first one was a little more intense than I realized and lasted way longer than I planned BUT the results were well worth it!  We spent 30 minutes in my Algebra 1 class doing the slope from tables one.  I was able to get a lot of formative assessment and in the end ALL students completed and worked diligently on 6 critical problems. 


This resulted in one of my favorite teaching moments of all time... 

Student: 'What's the point of this?'
Me: **thinking quickly of a witty response** 'When you put it on your head, you are learning by osmosis."  **secretly hoping they buy this**
Students:  'Oh my gosh, we are learning about that now in biology!! Cool!!'
Me: **thinking score cross-curricular vocabulary.**

I sent it to my principal laughing at the cross-curricular tie and it ended up going all though the district.  I even had teachers telling me students were wearing it in the cafeteria.  Later that year one student pulled it out and put it on during a test and when I asked him why, he said it made him feel smarter.  #teachermoment

Now let me share how to create your very first headband!  Any 6 problems will work and it is basically like a scavenger/mouse hunt.  You place the answer to a different problem on the left of the headband and a problem in the middle.  They solve the problem and connect/match it to the answer on a different piece forming a complete headband!


What I made a mistake of and was a reason the first time took so long was that you want to make all pieces connected like above.  The first time I had each piece with a space between and those precision cutters took forever!

AND DO NOT make them in order either... or then you have to redo and mix them all up... I've already been there, done that!

Each student recieves one copy of the headband to cut and construct.  I have a cut one projected on the board to show expectations. Sometimes I'll work one but most of the time I just demonstrate my expectations about connecting.  They solve the problem and look for the answer on another piece them solve that problem until they are back to the first piece.  Instant assessment for them which are my favorite kind of activities. 


I also have all mine designed to fit on 1 page.  Just as an FYI... these are great for those dark colored papers you might have that you can't really use for a WS.

AND don't worry, I've got templates for you as well as ALL my headbands shared below!

Another tip is to have students tape or staple them together so they can put them on right away.  And they will likely need to overlap and measure as they go.  I make them show work on the bands and just cover the answer or arrow.  One kiddo ended up making a belt instead so they can be pretty big. 

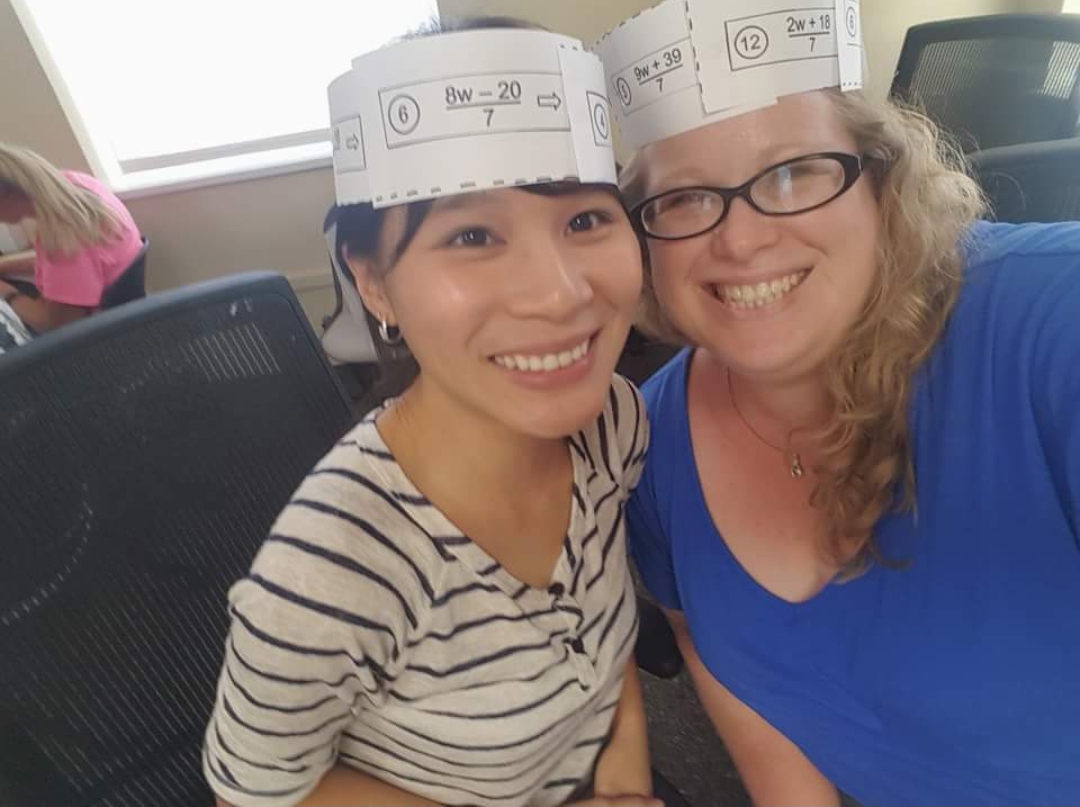
Here is what a couple of completed ones look like...


To store them, I just added a headband envelope in our notebook.


I'm not really sure how to say that I love these things!  I love seeing seniors wear them and post on their social media.  I even offer some credit for wearing them outside my class.  Anything to have kids talk about math!  

Some get creative with their'Headbands' too...


Get all resources here for FREE!!!  


I have them both in Word and PDF as always!  If you want my font, Janda Curly Girl, it is downloadable for free here!  It's one of my favorites!!

For any keys, please feel free to email me at camfan54@att.net from your school or professional account.  I've had students try and email for keys in the past but luckily their email said student! 

Enjoy the rage!!
Lisa

Friday, July 13, 2018

Build Me a Castle Review

How do you get your classes to finish 1,217 problems in 2 days? Give them a cup after each one!! Build me a Castle Review, SUCCESS! Crazy busy but so worth it!


A while back I saw a post online that someone did a review where after each problem, they received a cup to stack.  So simple and sooooooo engaging... so I thought!  Not so simple really.  It was fast.  It was furious.  It was rigorous.

Of course we couldn't just stack cups right?  We needed a theme!  The student above, Anosha and I came up with Build Me A Castle!  We ordered tiaras and even dressed princess themed the first day.  I didn't get a picture because we were going crazy.  This is not a review for the weak.

First, I laminated and used a bunch of task cards I had.  I even made one for standard to slope-intercept form.  Most of mine came from Algebra Accents on Teachers Pay Teachers.  I purchased her whole curriculum several years ago and it has been one of my best investments ever!  The ones I used will be listed below if you are interested.

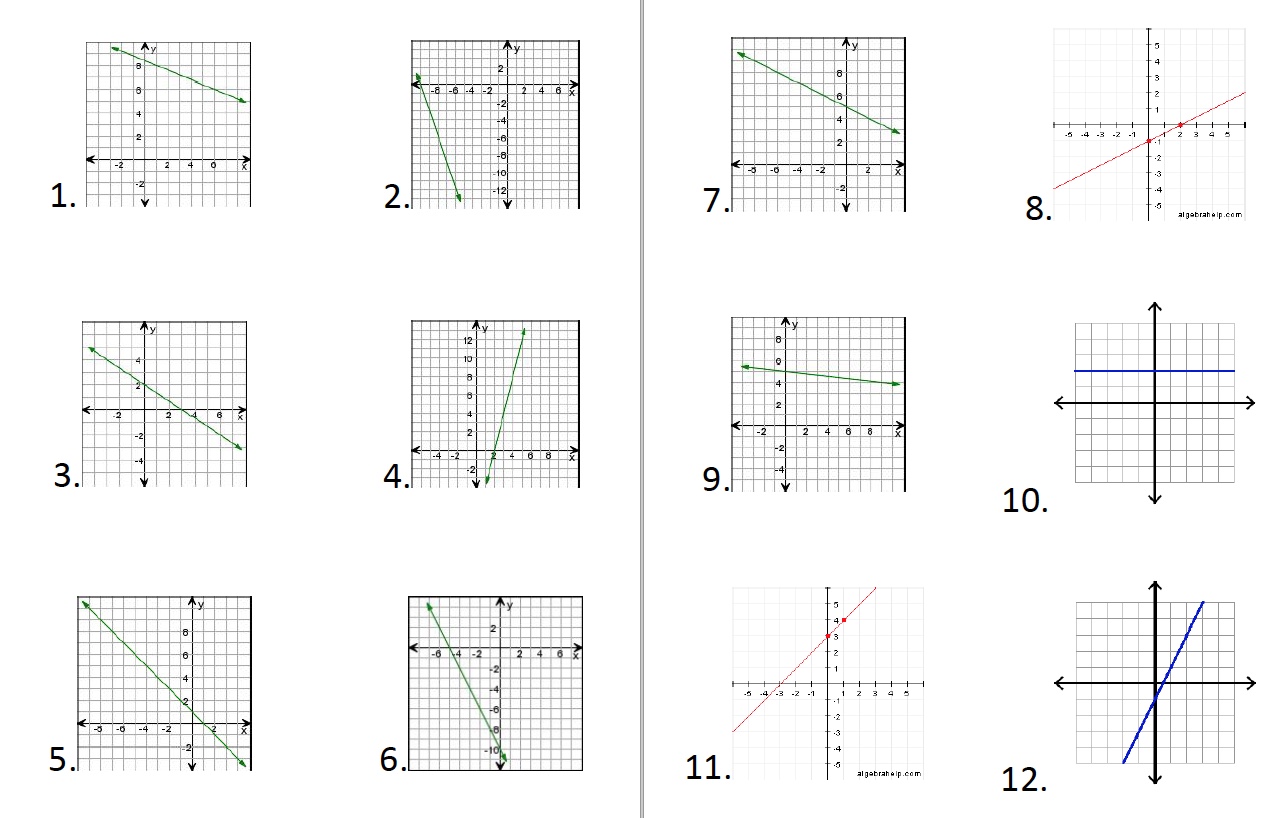
Really, any matching game can be used.  I'll include my slope matching game that you could just use the graphs for.

To say the students loved it would be an understatement. They did not stop. We did it for 2 solid days and they answered non-stop. I threw out easy and hard. Order of ops to exponential functions. It was a great spiral for the semester exam as I did it just before the end of the year.


I gave each student a wipe board to show their answer on. Each day I had about 5 task card stacks. Each group got one from each stack to start regardless of how many group members they had. It is easiest for you if each card stack is a different color. As each student solved, they came up to the teacher to check answers. If correct, they took a cup and a different problem. If wrong, you could have them correct of offer instruction.


I was surprised that as fast as it was moving, we were able to differentiate pretty good and make sure students were doing a variety of problems. At the end of the day, we took a cup count and let them start with that the next day. Another option is castle height or design.


The above were our winning group with 120 cups. I had them compete within the class then across my classes. Either way, they loved it and every group was able to spiral review.

It was a great activity I will use several times each year. I think my favorite thing was a way to use all those task cards again!!! I needed about 300 cups as an FYI.

Get a couple of my task cards for FREE here.  I will add any other task cards I create in the same folder so you can check back throughout the school year.  The ones I included right now are:

Slope Matching Activity with these graph cards:

Standard to Slope-Intercept Form


The Algebra Accents ones I used and were worth every penny (I think most are $3) were:


Enjoy!
Lisa


Let's Code and Roll... the Ozobot DICE!


I was really trying to work in the Ozobots once more this year!  We did not get them until December so we only had a semester, in addition to the shortened curriculum because of Hurricane Harvey, to use them.  I get so easily excited that I always end up over doing but we had some 'extra' time to work on geometry and I decided to work in a little coding.  How I feel about coding in math has been communicated quite extensively by me.  My colleagues and friends are surely sick of it but I can not see a better fit than order of operations and accuracy in math.  Beyond that are careers, life lessons, and of course interactions beyond the standard social media.

Read about my initial ideas and Ozobot lessons here.


I also wrote more about coding and math here.

Guest Blog: Ozobots in Algebra 1


So here comes the end of the year.  Kids are tired.  State tests are taken.  They need some motivation and engagement to get through the final haul of what has been a roller coaster Texas school year.  I decided a nice poster project to round out the Geometry Unit would be nice.  I could not have been more happy with the results.  The students blew me away with their coding and concepts mastery.  It was so rewarding and a great way to further practice our coding in math!

I first created dice with a combination of coding and geometry concepts.  There are 4 unique dice.  2 are numbered and 2 are lettered so you can mix it up.  I printed all the numbers on blue and letters on orange and laminated them.


For the instructions, I put the codes for all the dice under each number so they could just circle which ones they rolled.  I also created a rubric on the back.  I also stated to roll a dice and complete the action then roll again.  Some groups did all their roles then created so it is completely up to you.


 I also encouraged adding extra to it as well.  Many kids were so excited that they were scared to add more and mess it up.  I loved their excitement and pride in their work.  One young lady even asked we send the video to her Mom 😍 They just watched their Ozobot perfectly travel the line for about 15 minutes.  It was fabulous!


I provided one piece of the gridded chart paper to help with the geometry concepts.


One of the discussions we had was what happened when Ozobot chose left instead of right or got stuck somewhere?  All groups had worked that out and accounted for it in their projects.  It was educational magic!!

I have since firther developed in, incorporating space and fine turning where they get an even number of Geometry concepts and coding!


As an additional fun note, we did this activity with a Texas theme in my WeTeach_CS face-to-face!  This was teachers completing it and below is one of the completed ones....


Enjoy!
Lisa

Friday, June 1, 2018

DIY Teacher Notebook and all My Stuff for FREE!

Several years ago I was in a Teacher Quality Grant at Texas A&M.  One teacher shared the notebook she uses each year with us and I have been making one ever since.  I love having a one-stop go to for all my necessary info and one thing to file away at the end of the year.

This year I kind of ended on a Mario note so went with it for my notebook theme....


I just googled for some background paper and adapted all my editable resources to match.  I'll include a link to all my notebook stuff for you.

Below is a video of what is contained in my notebook.  Each teacher has their own needs but here are some ideas of what I have decided are necessary for my book.  I'll link older items like a grade book template and attendance pages for you as well.  


My earlier templates are kind of a mess as I was not quite versed in editing in power point but you can still use them as you wish!

Here is a video for you on how to change the background and font colors to match if you need:


Also, I'm quite a font junkie so many might need reformatting but my favorite are Janda Curlygirl and Alexis Marie. You can find both for free at dafont.com! I used these on a few template pages.

Here is the link to all my resources.


Including:


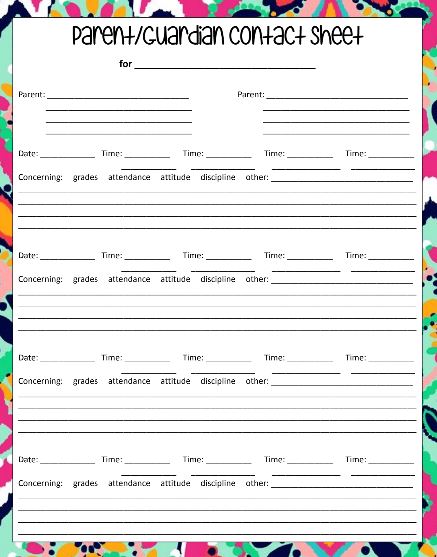
Contact Sheets:


Binder Spines:

Grade Sheets:

Covers/Dividers:

In preparation, I color print on cardstock and laminate the cover and dividers. You can also print on regular paper and laminate. I have one of those personal laminators and it's pretty thick so I used it for the cover this year.

For the slip sleeves, I just trim the edge off of regular slip sleeves from office depot. 

Both Staples and Office Depot offer binding services. They even have clear covers with solid backs if you desire. This year, I printed and used the 5 mil laminating with my personal laminator. 

I owe an extra Thank You to Ayme Warner for introducing the idea to us and graciously sharing all her templates!!  


Enjoy,
Lisa

High Schoolers Just Wanna Have Fun Too!!

I have been teaching a variety of levels and classes over my 17 years as an educator!  As a matter of fact, 17 years comes to close today as I write this blog.  I am not in any way your typical teacher and in fact pride myself on being #thatteacher.  

So I end up with fabulous decorations like this for my room....


Some of what makes me #thatteacher is my desire to not only have fun myself but find new ways to engage my students.  It seems education instruction is a little more boring when you get to high school.  And the material often lends itself to a more traditional setting but I've found high schoolers enjoy the gimmicky and fun activities just as much as when they were in elementary.  Why shouldn't they be allowed a little cartoony creativity like we used as a teaching tool when they were younger?

Several weeks ago I was contacted by a representative of education.com after coming across my blog.  This is my style of teaching.  These are the perfect kind of activities to help me engage and motivate my students.  Some are short, some are corny looking but the basics and fundamentals of learning come in all packages.  

Who wouldn't rather graph on a fun map than plain old graph paper?!?!


Something I have really stressed in recent years to my students is 'you guys have been doing this forever!'  It just didn't necessarily look like this, especially with graphing.  You still feel like it might be too young looking or do not like the grade level, adapt to fit your needs.  Please never let the listed 'grade level' be indicative of the concepts.  We graph as Grad Students!

The lesson I was referenced was the Science Project: Parallax*.  I also learned what the parallax is and got a quick cross-curricular lesson for my high school math class when we do dilation!


Automatically I was drawn to the simplicity and design.  Visually intrigued, it has a natural 'hook' for curiosity.  And the best thing about it, it is completely FREE!  That's right, education.com has all these activities for FREE.  Just sign up for a FREE account and get ready to learn as well as teach.  There is nothing better to me as a teacher as saving time and ten fold when it helps save another teacher time and a hundred fold when it is FREE.

This project was created for education.com by Judee Shipman who has published a great deal of lessons for the site.  The basic premise of the lesson is as follows:

The parallax is a mathematical construct that is used to measure the distances of faraway objects like the moon and stars. It is defined as the difference between the apparent locations of an object viewed from two different perspectives. For instance, if you view a TV set from five feet to the right of it, and someone else views the same TV set from five feet to the left of it, the parallax would be the angle of perception from directly in front of the TV set. In this project you will make your own calculations using parallax principles.

Problem:

What is the parallax principle?

Materials:

  • Computer with Internet access
  • Color printer
  • Digital camera
  • Typical office/hobby/hardware/craft supplies (paper, poster board, glue, etc.).

Procedure

  1. Read overview of relevant topics (see bibliography below).
  2. Address all of the terms and research questions mentioned here.
  3. Search and print out compelling images relevant to your topic.
  4. Construct and solve your own parallax problems.
  5. Carefully record all measurements and results.
  6. Analyze your data.
  7. Write a detailed report.
  8. Include graphics, charts and diagrams in your science fair display.

It is set up for a science fair project but as all teachers know, you can get ideas and activities anywhere.  Just like our students, we can find inspiration in a number of places and activities.  If you are a math teacher and wondering why I'm referencing a science fair project, please see the above statement 😉💓.  I find ideas everywhere!  I love doing anything to engage my students.  And high school math often needs help in motivating and engaging, that is why I love finding new and wonderful sites like education.com.  I can not wait to use more from them next year!!

How fun for a basic and necessary concept!

You never know where new ideas will come from, be open minded and remember that high schoolers enjoy the fun they had as younger students.  And sometimes, we as teachers do too! 

Thank you!

Enjoy!
Lisa


*Disclaimer and Safety Precautions

Education.com provides the Science Fair Project Ideas for informational purposes only. Education.com does not make any guarantee or representation regarding the Science Fair Project Ideas and is not responsible or liable for any loss or damage, directly or indirectly, caused by your use of such information. By accessing the Science Fair Project Ideas, you waive and renounce any claims against Education.com that arise thereof. In addition, your access to Education.com's website and Science Fair Project Ideas is covered by Education.com's Privacy Policy and site Terms of Use, which include limitations on Education.com's liability.

Warning is hereby given that not all Project Ideas are appropriate for all individuals or in all circumstances. Implementation of any Science Project Idea should be undertaken only in appropriate settings and with appropriate parental or other supervision. Reading and following the safety precautions of all materials used in a project is the sole responsibility of each individual. For further information, consult your state's handbook of Science Safety.

Friday, May 25, 2018

Ozobot Geometry Challenge!

Oh my sweet little Bot!  How the students and I have adored thee!  This year has been a unique experience working computer science basics of coding in to my math classroom.  Expanding and applying math in with robotics was rewarding and engaging.  You can read about my previous experiences at the links below.


We used them again to review and apply geometry concepts prior to the Geometry Unit.  On the Ozobot site, there is a great task card challenge for middle school by Erin Wilson. 


Download it here for FREE!

For my students, I wanted some higher level concepts and tasks so I developed my own task cards.  

I also provided cm graph paper for them to use.  I had them each complete a minimum of 4 tasks and if they realized multiple ones could be done within the same item, then I let them and secretly cheered behind their back for the thought processing.  It was not super intense and nice little integration into the content.


To prepare, I made one copy of the task cards and laminated them.  They were all placed on the back counter and students chose which one they wanted.  After completing, they took it back to the counter and chose another one.  That way they were not all doing the same tasks and I didn't have to copy and cut a bagillion cards (or store them). Win-win. 😀

I also cut the FREE Ozobot Practice sheet code templates up and provided them with 3,4 and end-line u-turn code templates if they needed.  This helped them having to get a new sheet for corrections.  You may download these from Teachers Pay Teachers for FREE here.  Thank you Macs Store for the great resource!

I included some teacher notes and the Texas TEKS standards.


Incorporating coding into my math classroom has been an incredible experience for my students.  Seeing math and being engaged has shown unique growth and attention to detail.  I can't wait to see how much more I can use it!

You may download all my resources from the Ozobot Classroom Lesson Library here for FREE!

Thank you to Erin Wilson for the fabulous activity and inspiration!

Enjoy,
Lisa